Apol Massebieau

How to set parallel and conditional reviewers in Form Workflow Plus

No comments

Let’s talk about the reviewers in your workflow. Going back to the Human Resources example from our last blog post, you can see that the Form Workflow add-on is very easy to use if you have one reviewer.

But what if you have several? For example, if you have more than one supervisor who can give approval to day-off requests. In this case, you’ll be setting up a process called parallel validation.

parallel reviewers

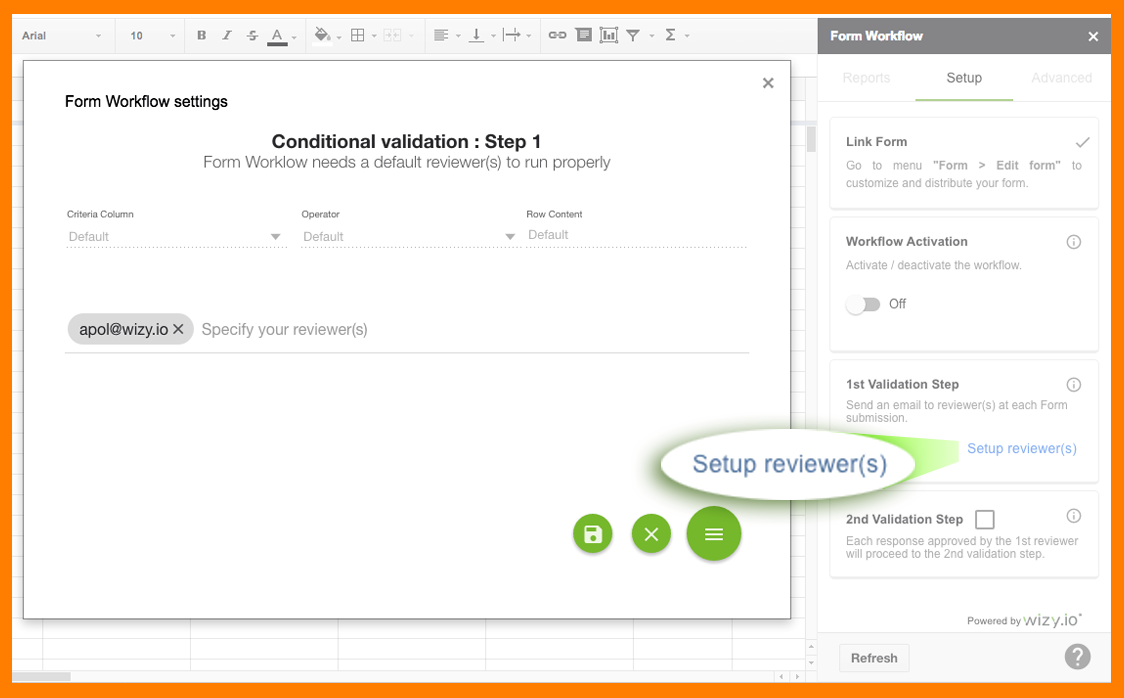
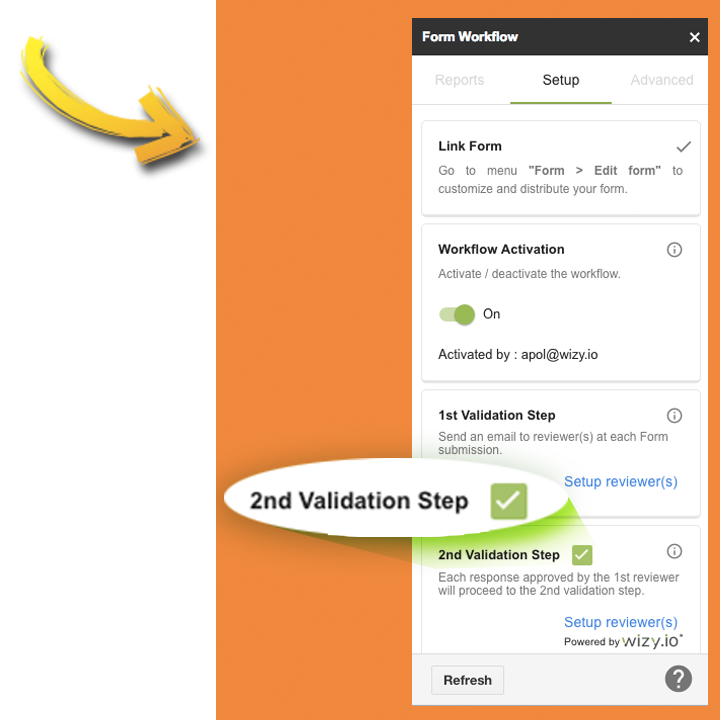
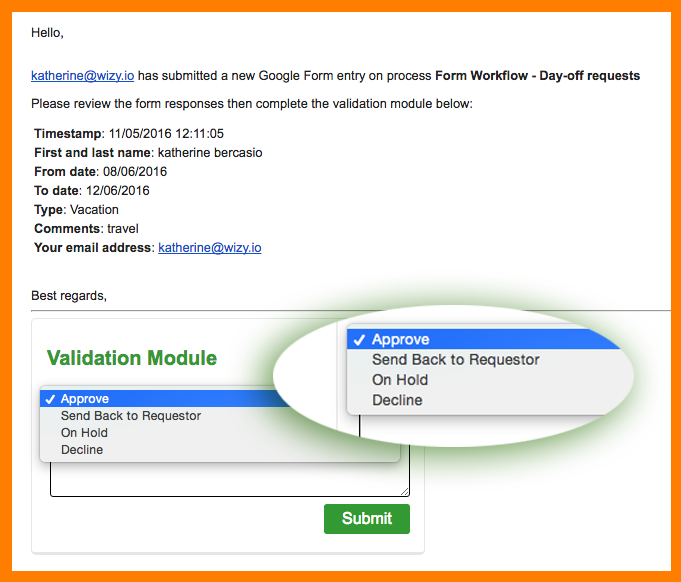
What you do is you click the blue Setup reviewer(s) button on the sidebar. This will open a pop-up window. Here, you will write the email addresses of all your supervisors. Every time somebody submits a day-off request on Google Forms, all the supervisors will receive an email asking for validation. As soon as one of them acts on it (approves it, declines it, puts it on hold, or sends it back to the requestor), the request is closed to the others.

Now what if you want certain requests to go to one supervisor and other requests to go to another supervisor? For example, you want all types of day-off requests to go to Supervisor A  except vacation leaves. Those you want to go to Supervisor B. It’s time to set up a conditional validation process.

default

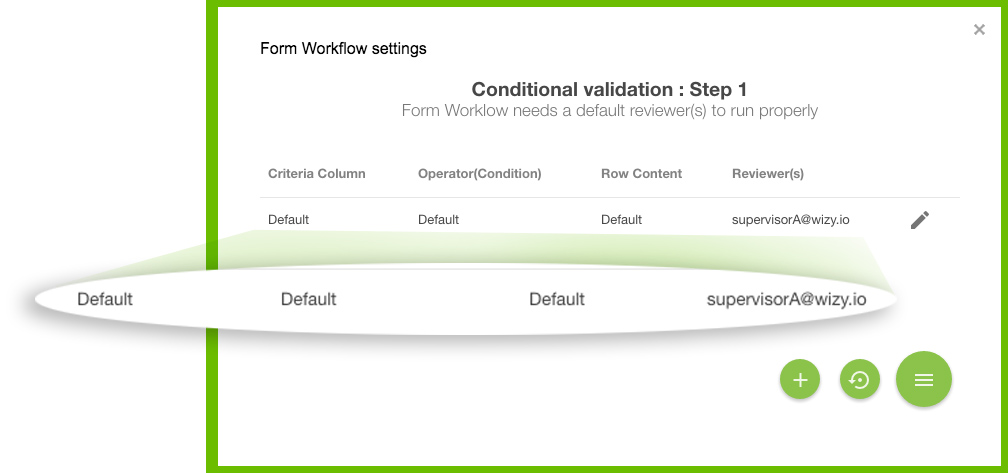
When you click on the Setup reviewer(s) button, you get the pop-up above. You will see the “default” line. Form Workflow will always have this, and the email address initially displayed will always be yours.

If you want Supervisor A to approve most day-off requests, you will type his email address here, to replace your own.

conditional reviewer

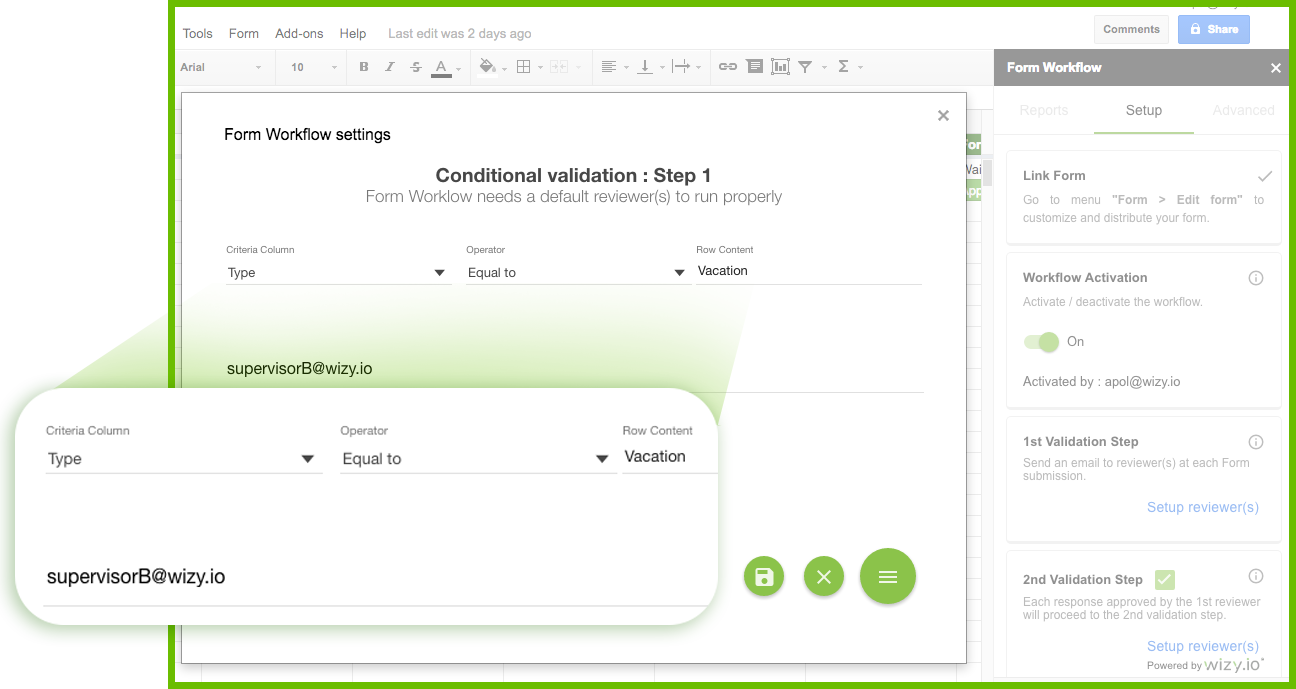
Now you want Supervisor B to approve vacation requests. What you do is you set up your Criteria (in this case “Type,” which the add-on detects from the spreadsheet column names), your operator (“Equal To”), and the Row Content. Here you put “Vacation.”

Every time somebody submits a Google form asking for a leave of type “Vacation,” this will be logged on the spreadsheet, and the add-on will take care of sending this particular request to Supervisor B.

Install Form Workflow Plus from the G Suite Marketplace now and try it for 2 weeks for free!

team-imgWizy.io’s customer success director Apol Massebieau has been a newspaper journalist, magazine editor, TV show host/producer, essay and fiction writer, and toy designer. She was an early adopter of Etsy and continues being fascinated by how small businesses thrive online.

Apol MassebieauHow to set parallel and conditional reviewers in Form Workflow Plus
Read more

How to validate a workflow with Google Forms

1 comment

You have a workflow in your organization that requires a request being submitted by one person, and approval being given by another. Say, you’re in Human Resources and you need to manage day-off requests. Our Form Workflow add-on is a great tool to help you do this.

Taking the HR example, the Google Sheets add-on will let an employee submit a day-off request through Google Forms. From there, it goes directly to a supervisor’s email for approval. You keep all the results logged in your spreadsheet. Our add-on even gives you a summary of everything going on. All seamless and easy!

To begin, you start Form Workflow from the add-on menu of your Google spreadsheet. Link a form to your spreadsheet by clicking the Create button in your add-on sidebar. To modify the form, go to Form in the top menu, then choose Edit Form.

create form steps

The next step is to determine your reviewer, or the person you want to validate the day-off request. Click the blue Setup Reviewers button, and enter the email address of your supervisor. You can have more than two reviewers, so go ahead and enter the email addresses of two or more supervisors. Once one of them acts on the request, it is considered done.

If you want another person to validate the request after a supervisor approves it, tick the 2nd Validation Step box in your sidebar. Enter the email address of the second reviewer here.

setup reviewer 1
2nd validation workflow

Going to the Advanced tab of Form Workflow will give you some more options. Tick the appropriate boxes if you  want your supervisor to be able to put a request on hold or send it back to the person making the request. Take note that for the latter option to work, you have to set up the Requestor Email box.

advanced tab

Remember to switch on the workflow in your sidebar. Once you do this, on each submission of the Day-off Requests form, the add-on will send an email to a supervisor asking for approval. (The Email Template area in the Advanced tab lets you personalize the email sent to the supervisor.)

activated ON

In this email, there will be a validation module, asking the supervisor to act on the request. In addition to Approve and Decline, reviewers have the two additional choices that you set up in the Advanced tab. They can put the request on hold, or send it back to the requestor.

validation module 1

How do you keep track of your workflows? Click on the Reports tab. It will give you a tally of all the processes, both done with and ongoing.

fw - reports all

We think you’ll agree that Form Workflow is a super-charged business tool! If you haven’t tried it yet, get Form Workflow here.


team-imgWizy.io’s customer success director Apol Massebieau has been a newspaper journalist, magazine editor, TV show host/producer, essay and fiction writer, and toy designer. She was an early adopter of Etsy and continues being fascinated by how small businesses thrive online.

Apol MassebieauHow to validate a workflow with Google Forms
Read more

How to know if your emails are being read

No comments

Raise your hand if you’re tired of writing, “Hi! I was wondering if you’ve had time to read my email…”

In a perfect world, everybody would reply to all the emails we send. That not being the case, the second best thing would be if we knew if and when our emails have been opened and read. It would save us the energy we spend wondering if our message got through, and the time it takes to compose a follow-up email.

This is totally possible with Wizy.io’s email tracking feature. How does it work? All you have to do is compose an email, and send it. That’s it. You don’t have to think about yet one more thing to add to your list of tasks because our Chrome extension will automatically track every email that you create. The check in the Track box at the lower left corner of your email confirms this. (What do you do if you don’t want to track a particular email? Just untick this box.)

Tracking-on-and-off-small-cropped

Wizy.io will send you live notification informing you as soon as the person you are emailing opens your message.  Inside the live notification itself, you can do two things: (1.) Open the email that you are tracking. (2.)  Mute the conversation. You’ll then stop receiving the live notification, an option you may want if you emailed multiple recipients.

Live-Notification-cropped-tight


Information gets to you quick because an eye will appear next to every email you are tracking. The eye is grey if the email has not been opened. It turns green as soon as the email is read. The eye is also there right inside your email, in the upper right corner.

eye_grey_to_green_cropped

Now hover your mouse over the eye. A tool tip will give you the details you need, how many times the email has been opened and when.

tip-tool-box-small

One more place you can see tracking information is inside the Wizy.io sidebar. Here you have a summary. You’ll see a list of the tracked emails you have sent a particular contact, as well as the details of when he opened them.

contact sidebar

It’s time you stopped wondering if your emails are being read. Try Wizy.io right now.

Register to get early access to our beta!

Get an invite


Apol MassebieauHow to know if your emails are being read
Read more